
Introduction
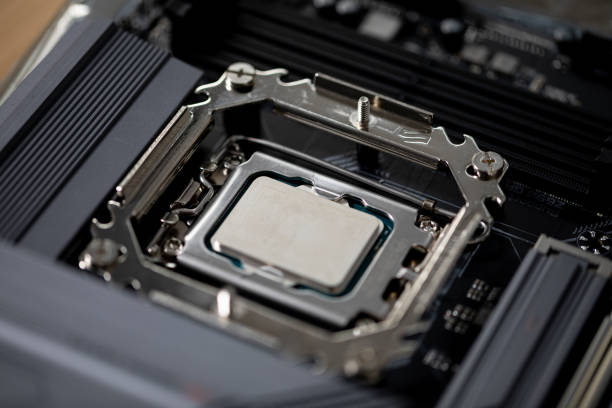
How Tight Should CPU Cooler Be? Installing a CPU cooler correctly is essential for maintaining system stability and ensuring optimal cooling performance. Many PC builders and enthusiasts wonder, “How tight should CPU cooler be?” Finding the right balance between a secure fit and avoiding damage is crucial. If the cooler is too loose, it won’t make proper contact with the CPU, leading to poor heat dissipation and overheating. On the other hand, overtightening can damage the motherboard or CPU, causing performance issues. In this article, we’ll discuss the ideal CPU cooler tightness, potential risks of improper installation, and best practices to achieve the perfect fit.
Why CPU Cooler Tightness Matters
A CPU cooler helps dissipate heat generated by the processor. The tightness of the cooler plays a key role in ensuring proper heat transfer. If the cooler is not secured correctly, it may lead to various performance issues.

Effects of a Loose CPU Cooler
- Poor Heat Transfer: If the cooler isn’t tight enough, it won’t make proper contact with the CPU, reducing heat dissipation efficiency.
- Higher Temperatures: Loose coolers result in inadequate cooling, leading to overheating and potential thermal throttling.
- System Instability: A poorly mounted cooler may cause unexpected shutdowns, lags, or performance drops.
- Potential Hardware Damage: Vibrations from a loose cooler can damage the motherboard or CPU socket over time.
Risks of an Overtightened CPU Cooler
- Motherboard Damage: Applying excessive pressure can warp or crack the motherboard.
- CPU Damage: Some coolers exert direct pressure on the CPU, and overtightening may damage delicate internal components.
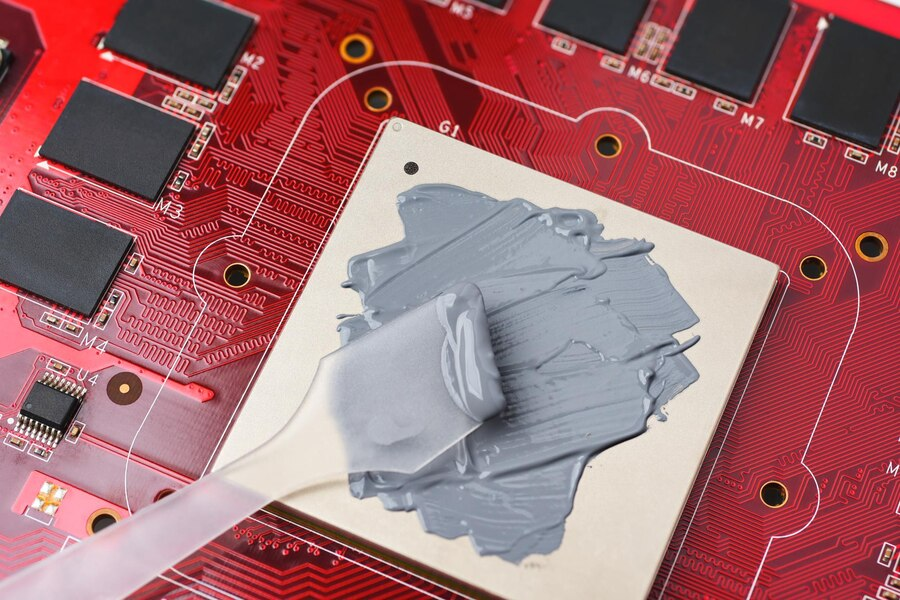
- Uneven Thermal Paste Distribution: Too much pressure can squeeze out the thermal paste unevenly, reducing cooling efficiency.
- Difficult Removal: Over-tightened coolers can be difficult to remove without causing hardware damage.
Finding the Perfect Tightness for Your CPU Cooler
Achieving the right level of tightness requires a careful approach. Here are the steps to ensure an optimal fit:
1. Follow Manufacturer Guidelines
Every CPU cooler comes with a set of instructions from the manufacturer. These guidelines provide recommended tightness levels and installation steps, ensuring a safe and effective mounting process.
2. Hand-Tighten First, Then Use a Screwdriver
Start by screwing in the cooler by hand until you reach resistance. Then, use a screwdriver to secure the screws slightly more, but avoid excessive force.
3. Tighten in a Cross-Pattern
To ensure even pressure distribution:
- Lightly tighten one screw.
- Move diagonally to the opposite screw and tighten it slightly.
- Repeat the process for the remaining screws, gradually increasing tightness in small increments.
4. Check for Even Contact
Before fully securing the cooler, gently wiggle it to ensure it sits flush against the CPU. If there’s noticeable movement, tighten it slightly more.
5. Monitor Temperatures
After installation, boot up your system and monitor CPU temperatures using tools like HWMonitor, Core Temp, or Ryzen Master. If temperatures are unusually high, the cooler may be too loose. If temperatures fluctuate excessively, it might be too tight.
Special Considerations for Different Cooler Types
Air Coolers
- Most air coolers use screws or brackets for mounting.
- Tighten screws evenly to ensure firm contact without excessive force.
- If the cooler has spring-loaded screws, tighten until they stop but do not force them further.
AIO (All-in-One) Liquid Coolers
- AIO coolers use a backplate for mounting.
- Secure the cooler until you feel firm resistance.
- Avoid over-tightening, as it can bend the motherboard and reduce thermal efficiency.
Custom Water Blocks
- Custom water blocks require precise mounting pressure.
- Some manufacturers provide specific torque values for proper installation.
- Tighten incrementally while checking for even pressure distribution.

How to Adjust CPU Cooler Tightness
If you suspect that your CPU cooler is too tight or too loose, follow these steps:
- Turn Off the System – Always unplug the PC before making adjustments.
- Loosen or Tighten Screws Evenly – Use small turns to adjust each screw in a balanced manner.
- Reapply Thermal Paste if Necessary – If you remove the cooler, clean off old thermal paste and apply a fresh, even layer.
- Retest Temperatures – Boot the system and monitor temperature changes to ensure improvements.
FAQs
1. How do I know if my CPU cooler is too tight?
If your motherboard bends, your PC doesn’t boot, or CPU temperatures fluctuate erratically, your cooler may be overtightened.
2. What happens if my CPU cooler is too loose?
A loose cooler can cause overheating, system crashes, and reduced performance due to inadequate heat transfer.
3. Should I use a torque screwdriver for installing my CPU cooler?
For precision cooling setups, a torque screwdriver set to manufacturer specifications can prevent overtightening.
4. How often should I check CPU cooler tightness?
Check your cooler’s tightness every 6–12 months, especially if you notice temperature fluctuations or system instability.
5. Can I overtighten an AIO cooler?
Yes, overtightening an AIO can damage the mounting bracket or motherboard. Tighten until firm, but avoid excessive force.
Conclusion
So, how tight should CPU cooler be? The key is achieving a secure fit without overtightening. A properly installed cooler ensures efficient heat dissipation, preventing overheating and extending the CPU’s lifespan. By following manufacturer guidelines, using a cross-pattern tightening method, and monitoring temperatures, you can maintain the perfect balance for your cooling system. Whether you’re using an air cooler, AIO, or custom water block, careful installation will keep your system running efficiently for years to come.